
I am so excited to share with you my absolutely fun and irresistible Halloween Sheet Cake with Gummy Worms, Candy Corn Pumpkins, and Risqué "RIP" Cookies Recipe that never fails to bring smiles and spooky delight at my gatherings. This cake blends rich chocolatey goodness with playful Halloween-themed decorations, making it the perfect centerpiece for any party or cozy night in. The mix of fudgy cake, luscious frosting, and those cheeky “RIP” cookies topped with gummy worms and candy corn pumpkins make it taste as delightful as it looks. Trust me, once you try this recipe, you’ll want to make it every Halloween!
Why You'll Love This Halloween Sheet Cake with Gummy Worms, Candy Corn Pumpkins, and Risqué "RIP" Cookies Recipe
What truly gets me about this Halloween Sheet Cake with Gummy Worms, Candy Corn Pumpkins, and Risqué "RIP" Cookies Recipe is the flavor combination—deep, rich chocolate from the cake and frosting, paired with the crunchy texture of cookie crumbs and the chewy, fruity gummies on top. Each bite is like a little party in your mouth that’s both smooth and playful. It’s deliciously sweet without being overwhelming, which makes it a winner with kids and adults alike.
But what really makes me recommend this recipe is how straightforward it is to prepare. Using a boxed cake mix keeps things simple, yet the homemade touches with the “RIP” cookies piped with melted chocolate and the candy decorations make it look impressive and festive. It’s an ideal recipe when you want something easy but impactful for Halloween parties, school events, or family dinners. Plus, who doesn’t love the fun factor of gummy worms and candy pumpkins on a decadent dessert?
Ingredients You'll Need
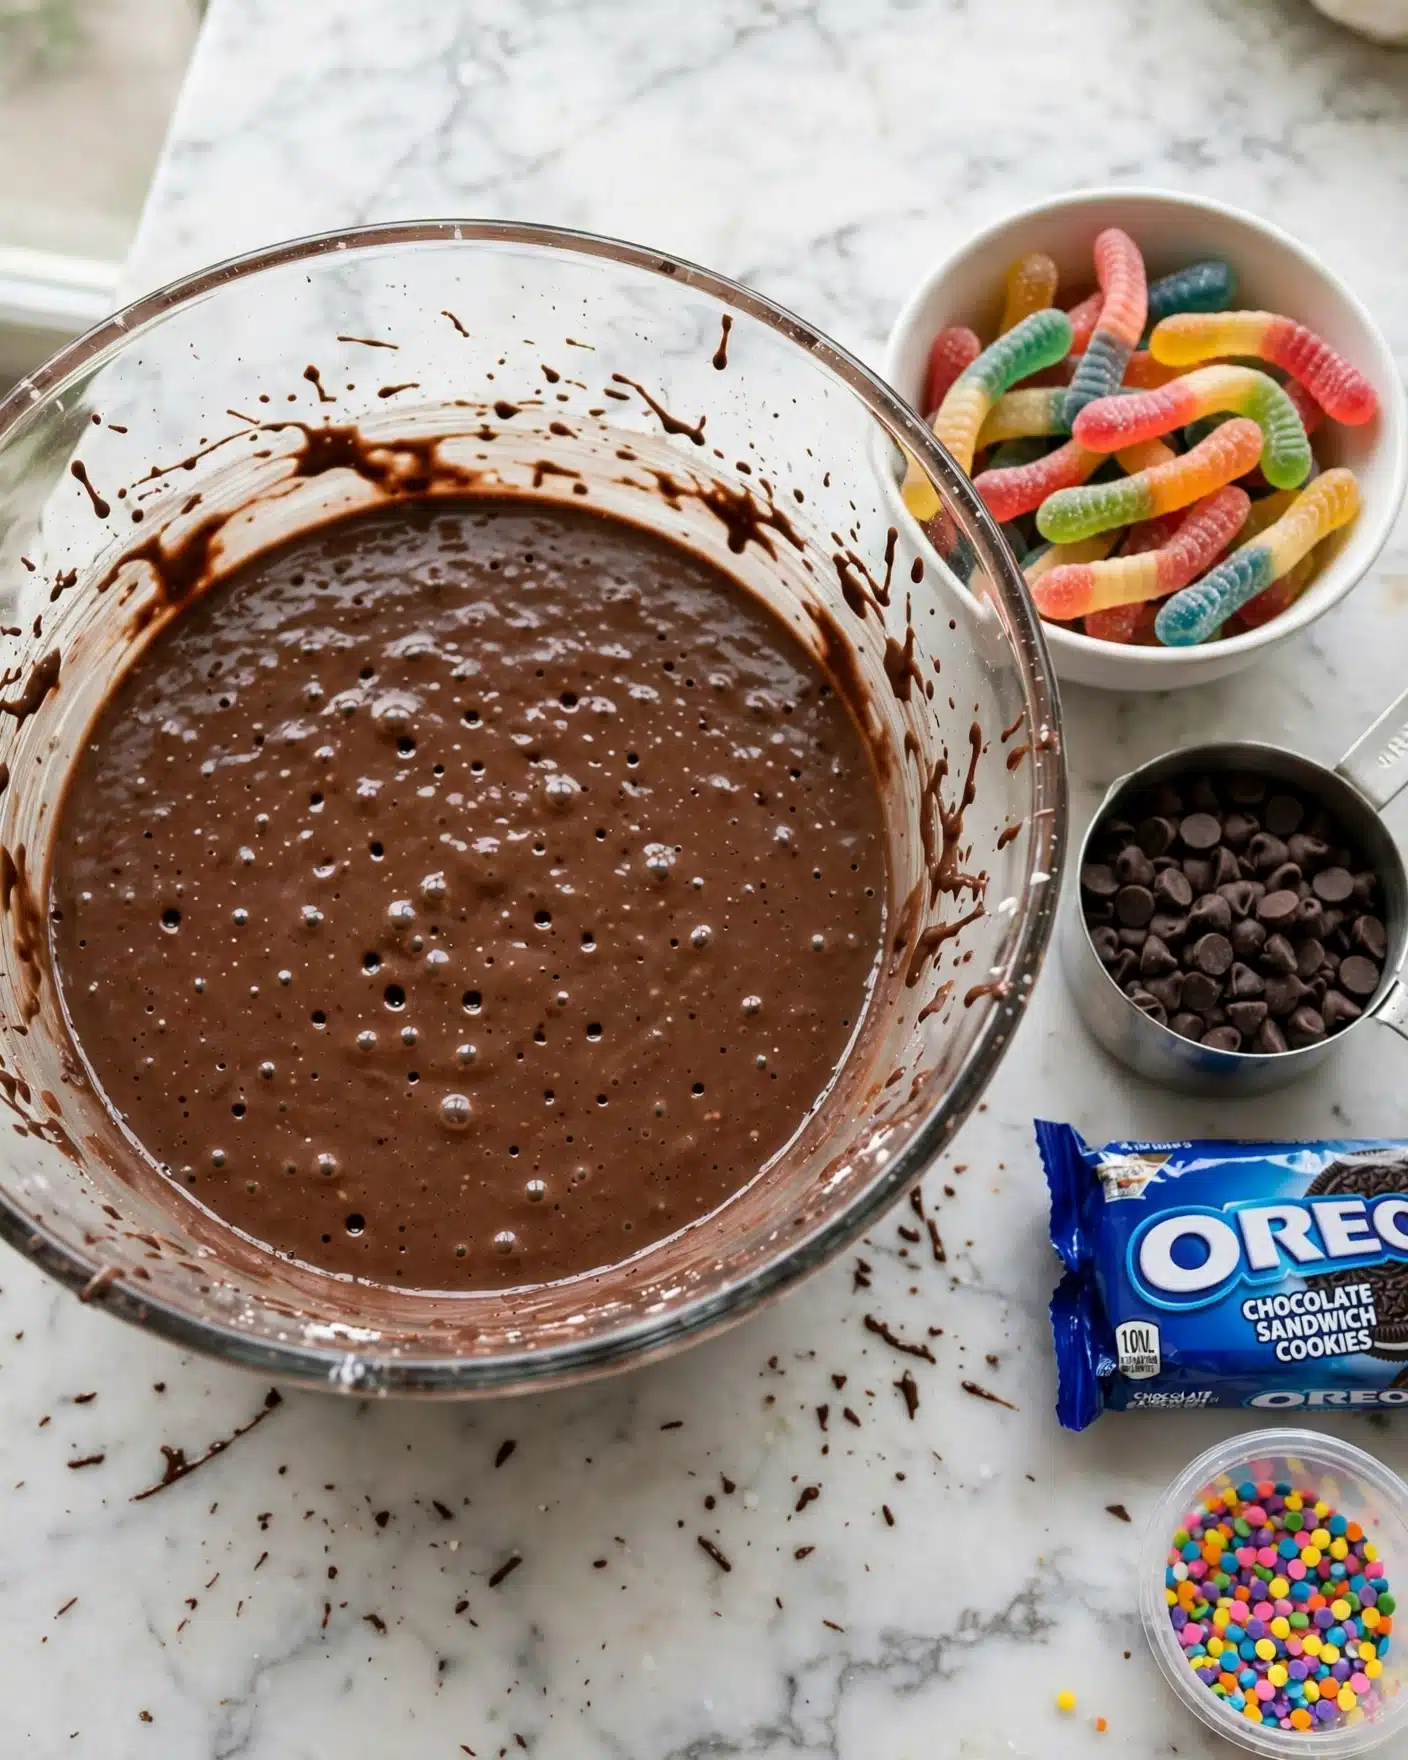
Gathering the ingredients for this cake is simple, and every element has a special role to play—whether it’s the fudgy texture of the chocolate cake mix or the decorative sparkle of the candy pumpkins. Each item contributes flavor, appearance, or that satisfying crunch that makes this cake truly feel like a Halloween treat.
- Chocolate fudge cake mix: The base for our moist, rich chocolate cake that everyone loves.
- Eggs: Helps bind the batter and add a lovely texture.
- Oil: Keeps the cake tender and moist.
- Chocolate frosting: Provides a smooth, creamy layer for the toppings to stick to.
- Chocolate sandwich cookies (about 32): Crumbled for a crunchy, cookie crumb topping that adds great texture.
- Milano cookies (10): For making the “RIP” cookies that add personality and Halloween spirit.
- Chocolate chips (½ cup): Melted for writing “RIP” on the Milano cookies with precision.
- Gummy worms: Fun and colorful, they add a creepy, chewy effect to the decoration.
- Candy corn pumpkins: Tiny, festive candies that bring vibrant color and sweetness.
- Sprinkles: Optional but perfect for adding extra sparkle and texture.
Directions
Step 1: Preheat your oven to 350 degrees Fahrenheit and generously spray a 9x13 inch baking pan with cooking spray. This ensures your cake won’t stick and will have perfect edges.
Step 2: In a large mixing bowl, whisk together the chocolate cake mix, eggs, oil, and water following the package directions. Mixing thoroughly but gently ensures a smooth batter without lumps.
Step 3: Pour the cake batter evenly into your prepared pan, smoothing the top with a spatula so it bakes uniformly.
Step 4: Bake the cake according to package instructions, usually between 30-35 minutes. I always test with a toothpick inserted in the center—when it comes out clean, it’s ready.
Step 5: While the cake bakes, take 9-10 Milano cookies and set them on a plate to prepare your “RIP” toppers.
Step 6: Melt the chocolate chips in a microwave-safe bowl in 20-second intervals, stirring well each time until smooth. Transfer the melted chocolate into a plastic sandwich bag and snip a tiny corner off for piping. Carefully write “RIP” on each Milano cookie with the melted chocolate.
Step 7: Place the “RIP” cookies into the refrigerator to set the chocolate quickly while you finish prepping the cake.
Step 8: Using a food processor, blitz the chocolate sandwich cookies into fine crumbs. This will become the crunchy topping layer for the cake.
Step 9: Scoop the chocolate frosting into a microwave-safe bowl and microwave for 20 seconds. Stir well—the warmth will make it pourable and easier to spread evenly.
Step 10: Once your cake is out of the oven and still warm but not hot, pour the frosting evenly over the top. Use a spatula to spread it into an even layer for ultimate indulgence.
Step 11: Sprinkle the crumbled chocolate sandwich cookies over the frosting to create that crumbly “earth” effect perfect for our Halloween theme.
Step 12: Decorate the cake with your “RIP” Milano cookies, candy corn pumpkins, gummy worms, and any sprinkles you like. Arrange them creatively for the ultimate spooky look. Let the cake cool enough before slicing and serving to keep your decorations perfectly in place.
Servings and Timing
This Halloween Sheet Cake with Gummy Worms, Candy Corn Pumpkins, and Risqué "RIP" Cookies Recipe makes about 15 generous servings, perfect for a party or large family gathering. The prep time is around 10 minutes, mainly prepping the cake batter and decorations. Baking takes approximately 30 to 35 minutes, plus an additional 10 minutes to assemble and decorate. Overall, you should expect a total time of about 45 to 50 minutes from start to finish. Don’t forget to allow some cooling time once out of the oven so that your frosting and cookie decorations set beautifully.
How to Serve This Halloween Sheet Cake with Gummy Worms, Candy Corn Pumpkins, and Risqué "RIP" Cookies Recipe
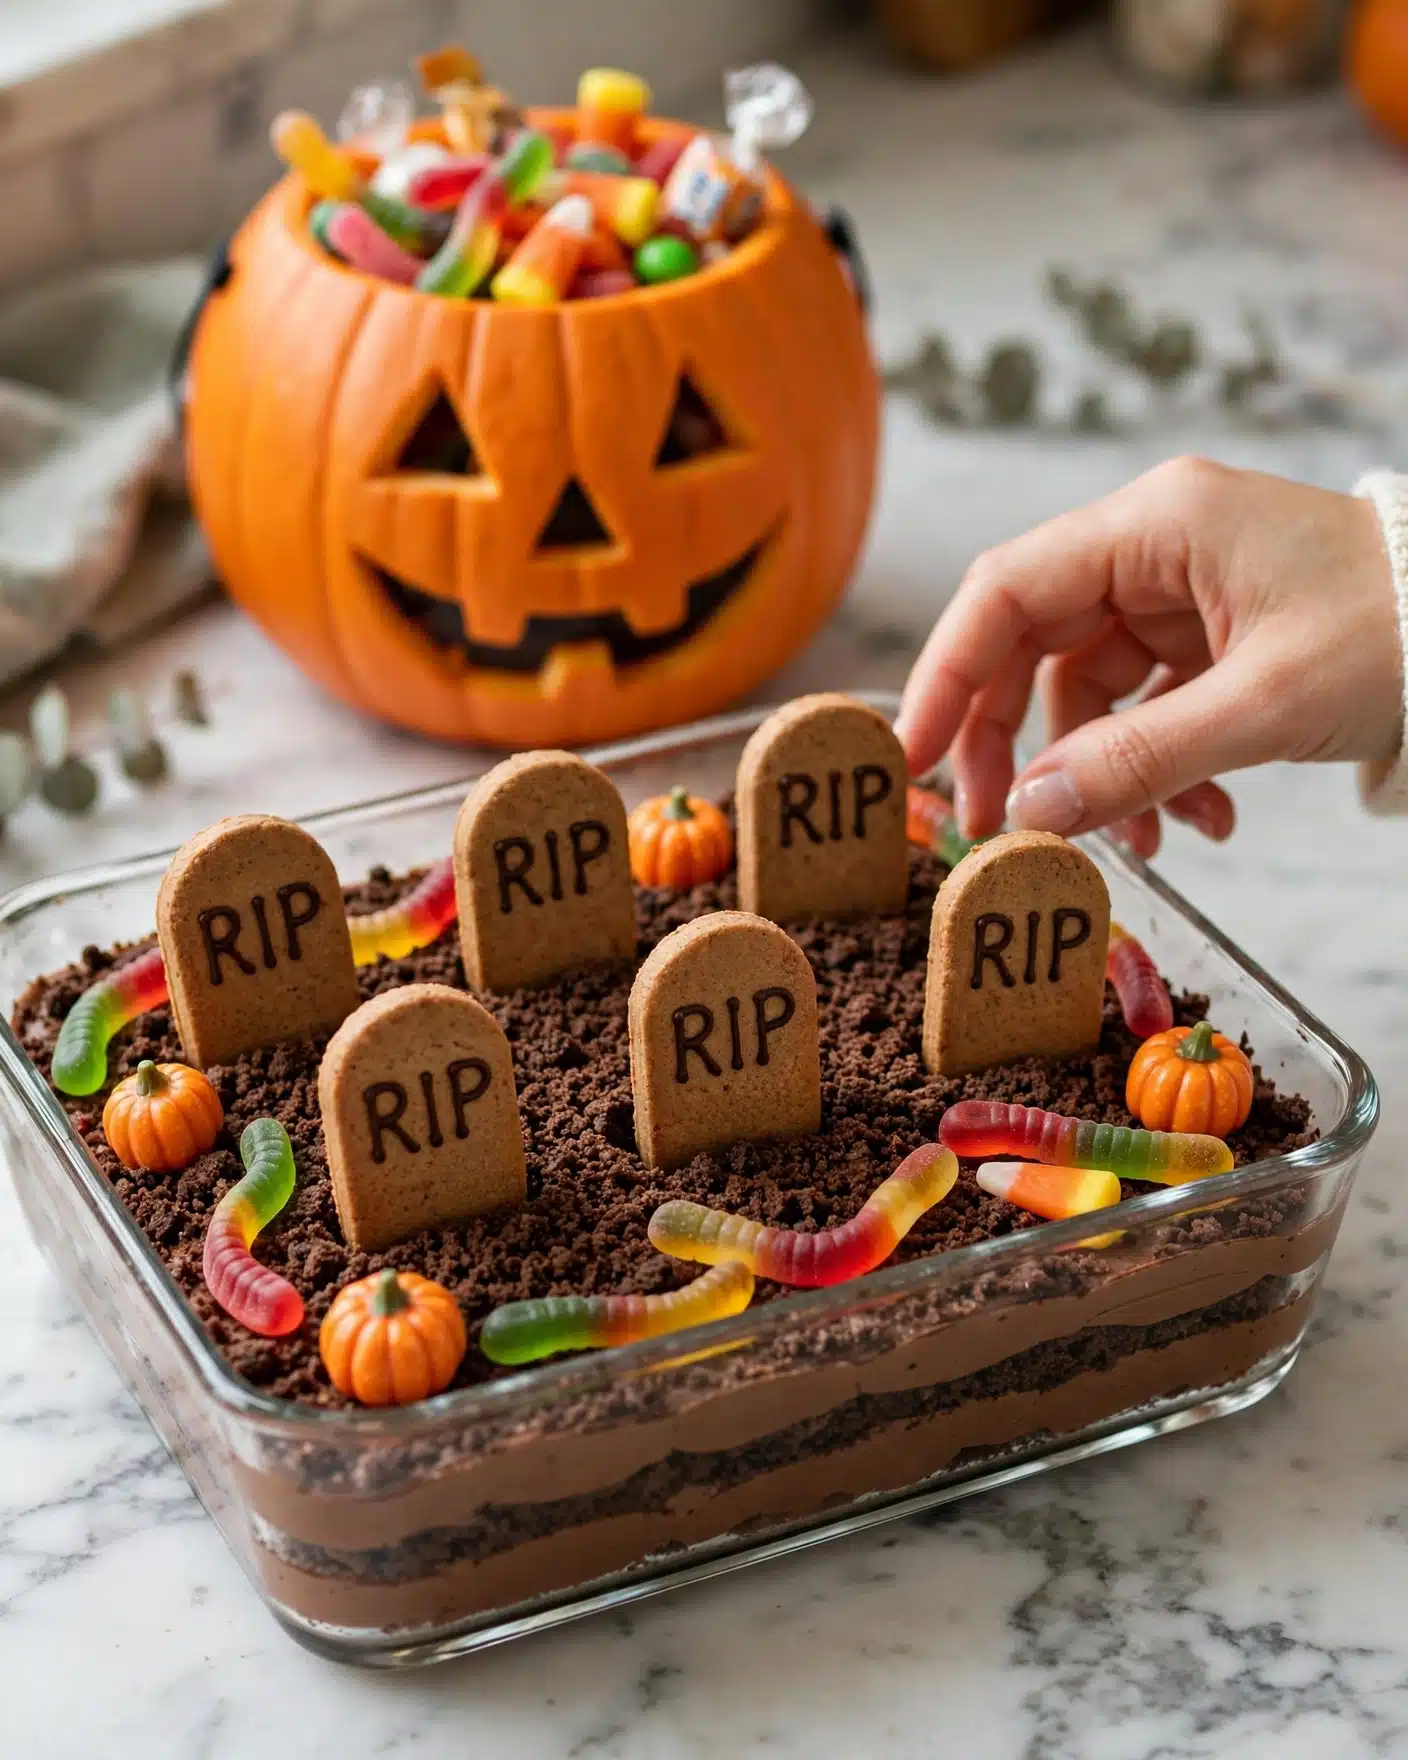
When it comes to serving this festive cake, I love to keep it simple but joyful. I often serve it at room temperature because that’s when the chocolate frosting is creamy and the cookie crumbs maintain their crunch without getting soggy. A nice touch is to slice it into hearty pieces so everyone can enjoy a bit of frosting, cake, and decorations in every bite.
I also like to add a little extra visual flair on the serving plate by arranging a few more gummy worms and candy corn pumpkins around each slice, giving guests something to smile about even before the first bite. It’s a fun way to enhance the Halloween vibe without much extra effort. For a kid-friendly party, placing the cake alongside bowls of popcorn or fresh fruit balances the sweetness nicely.
For drinks, I recommend pairing this cake with cold milk, hot cocoa, or sparkling apple cider. The smoothness of milk or cocoa contrasts wonderfully with the rich chocolate flavors, while cider adds a festive, crisp touch. This cake shines at Halloween parties, family dinners, or anytime you want a delicious, playful dessert to brighten a rainy autumn evening.
Variations
I love how adaptable this Halloween Sheet Cake with Gummy Worms, Candy Corn Pumpkins, and Risqué "RIP" Cookies Recipe is. If you want to switch things up, try using a different flavor cake mix, like red velvet or pumpkin spice, to give it a new twist while keeping the toppings festive and fun. It’s easy to customize according to what you have and your preferences.
For those needing dietary modifications, I’ve successfully used gluten-free chocolate cake mixes without losing any of the deliciousness. Vegan options are possible, too, by substituting eggs with flax eggs and using dairy-free frosting and cookies. The decorations make it so playful and personal you won’t even miss the traditional ingredients!
If you prefer a different cooking style, I’ve also tried making cupcakes with this same concept, which are perfect for handing out at school or smaller gatherings. Just adapt the baking time and decorating accordingly. You could get creative with the “RIP” messages or use different shaped cookies or Halloween candies to match themes or parties.
Storage and Reheating
Storing Leftovers
If you have leftovers from this Halloween Sheet Cake with Gummy Worms, Candy Corn Pumpkins, and Risqué "RIP" Cookies Recipe, store them in an airtight container at room temperature if you plan to eat them within 1-2 days. For longer storage, keeping it in the refrigerator is best to maintain the frosting’s freshness and prevent the gummy worms from drying out. I usually cover the cake loosely with plastic wrap or place it under a cake dome to keep it moist without squashing the decorations.
Freezing
Freezing this cake is definitely possible and works well if you want to prepare ahead of time. Just slice the cake into portions, wrap each piece tightly in plastic wrap, then place them in a freezer-safe container or bag. It keeps well frozen for up to 2 months. When you’re ready to enjoy it, thaw overnight in the refrigerator to keep the moisture and texture intact.
Reheating
I don’t recommend microwaving the already frosted cake because it can melt the frosting unevenly and make the gummy worms stick together. Instead, I like to eat it at room temperature or chilled right from the fridge. If you do want it slightly warm, try thawing frozen slices in the refrigerator first, then letting them sit at room temperature for 30 minutes before serving. This way, the flavors come alive without compromising the fun decorations.
FAQs
Can I use homemade chocolate cake instead of boxed mix?
Absolutely! If you prefer homemade cake, just ensure it’s a rich, dense chocolate cake to provide the same fudgy texture. You might need to adjust baking times slightly, but the decorations and toppings work perfectly on any chocolate base.
How do I keep the gummy worms fresh on the cake?
Gummy worms can dry out if left exposed for too long. I recommend adding them right before serving and keeping the cake covered if sitting out for a while. You can also store the cake refrigerated and add gummy worms once ready to serve for the freshest texture.
Can I make the “RIP” cookies ahead of time?
Yes! The Milano cookies with the piped chocolate “RIP” messages can be made a day or two in advance. Keep them refrigerated in an airtight container until you’re ready to decorate the cake.
What if I don’t like candy corn pumpkins?
No worries! You can swap those out for other Halloween candies like mini pumpkins made from white chocolate or even tiny candy eyeballs. The key is to have festive, colorful toppers that add charm and fun.
Is this cake suitable for large parties?
Definitely! Since it makes about 15 servings, it’s perfect for medium-sized gatherings. For larger crowds, you can easily double the recipe or make several sheet cakes, each decorated differently for variety and flair.
Conclusion
I truly hope you’ll try this Halloween Sheet Cake with Gummy Worms, Candy Corn Pumpkins, and Risqué "RIP" Cookies Recipe because it combines everything I love about festive baking—fun decorations, rich chocolate flavor, and easy steps that make impressing your guests a breeze. It’s become a go-to for me every fall, and I promise it will quickly become a favorite in your home, too. Happy baking and even happier haunting!
PrintHalloween Sheet Cake with Gummy Worms, Candy Corn Pumpkins, and Risqué "RIP" Cookies Recipe
This Halloween Sheet Cake is a festive and delicious chocolate dessert perfect for spooky celebrations. Made from a simple chocolate fudge cake mix with a rich chocolate frosting, it’s topped with crushed chocolate sandwich cookies, chocolate-decorated Milano cookies shaped as tombstones, gummy worms, candy pumpkins, and sprinkles for that fun Halloween vibe. Quick to prepare and sure to impress trick-or-treaters and party guests alike.
- Prep Time: 10 minutes
- Cook Time: 35 minutes
- Total Time: 45 minutes
- Yield: 15 servings
- Category: Dessert
- Method: Baking
- Cuisine: American
Ingredients
For the Cake
- 1 box Chocolate fudge cake mix
- 2 eggs
- ¼ cup oil
- Water (as directed on cake mix box)
For the Frosting and Toppings
- 1 container chocolate frosting
- About 32 Chocolate sandwich cookies (Oreos)
- 10 Milano cookies
- ½ cup chocolate chips
- Gummy worms
- Candy corn pumpkins
- Sprinkles
Instructions
- Preheat and Prepare Pan: Preheat your oven to 350°F (175°C) and spray a 9x13 inch baking pan with cooking spray. Set aside.
- Mix Cake Batter: In a large mixing bowl, whisk together the chocolate fudge cake mix, 2 eggs, ¼ cup oil, and water according to the package directions until combined and smooth.
- Pour Batter into Pan: Pour the prepared batter evenly into the sprayed 9x13 inch pan.
- Bake the Cake: Bake in the preheated oven for 30-35 minutes or according to package instructions, until a toothpick inserted in the center comes out clean.
- Prepare Tombstone Cookies: Lay out 9-10 Milano cookies on a plate and set aside.
- Melt Chocolate Chips: Heat the chocolate chips in a microwave-safe bowl in 20-second increments, stirring well each time until smooth and melted.
- Write 'RIP' on Cookies: Transfer melted chocolate into a small plastic sandwich bag, snip a tiny corner off, and pipe the letters “RIP” onto each Milano cookie. Place the decorated cookies in the refrigerator to allow chocolate to set.
- Make Oreo Crumbs: Add chocolate sandwich cookies to a food processor and blitz until they become fine crumbs. Set aside.
- Prepare Frosting: Scoop chocolate frosting into a microwave-safe bowl and microwave for 20 seconds, then stir well until pourable.
- Frost the Cake: Pour the softened frosting evenly over the cooled cake surface.
- Add Oreo Crumbs: Sprinkle the crushed Oreo cookie crumbs evenly over the frosting layer.
- Decorate Cake: Arrange the chilled RIP Milano cookies on the cake, then add gummy worms, candy pumpkins, and sprinkles to create a spooky Halloween themed decoration.
- Serve and Enjoy: Slice the decorated cake and enjoy your festive Halloween treat!
Notes
- Ensure the cake has cooled before frosting to prevent melting.
- Melt chocolate chips carefully to avoid burning; stir often.
- Use a piping bag or plastic bag tip for neat writing on cookies.
- You can substitute gummy worms and candy pumpkins with other Halloween-themed candies.
- Store leftovers in an airtight container at room temperature for up to 3 days.




Leave a Reply