
I absolutely love sharing this Mummy Cookies Recipe because it perfectly captures the fun and festive spirit of any Halloween gathering. These adorable treats combine the crunch of vanilla cookies with a smooth white candy coating that looks like mummy bandages, all topped off with cute little candy eyes that bring them to life. I find them so easy and satisfying to make that they’ve become a go-to for parties and treat tables at home with family and friends. Plus, they look impressive without any complicated techniques, which makes me happy every time I whip them up.
Why You'll Love This Mummy Cookies Recipe
From the very first bite, I’m hooked on how the sweet creaminess of the white candy coating pairs with the crisp vanilla cookie underneath. The mini M&M eyes add a pop of color and a little bit of chocolate that balances the overall sugariness perfectly. Honestly, they taste just as delightful as they look, which is something I always aim for when choosing recipes to share. It’s that combination of visual charm and simple, satisfying flavors that makes these cookies stand out in my recipe collection.
What excites me even more is how effortlessly you can make these mummies come to life. The process is straightforward—melt, dip, drizzle, and decorate—and doesn’t require any fancy equipment. I can usually have a whole batch ready in well under an hour, including setting time, which is perfect when I’m prepping last-minute treats for parties or school events. These cookies are versatile, too; they work beautifully as festive snacks for Halloween but are cute enough to brighten up any afternoon tea or kid’s get-together. I can’t wait for you to try making them and see for yourself how special and fun this Mummy Cookies Recipe really is!
Ingredients You'll Need
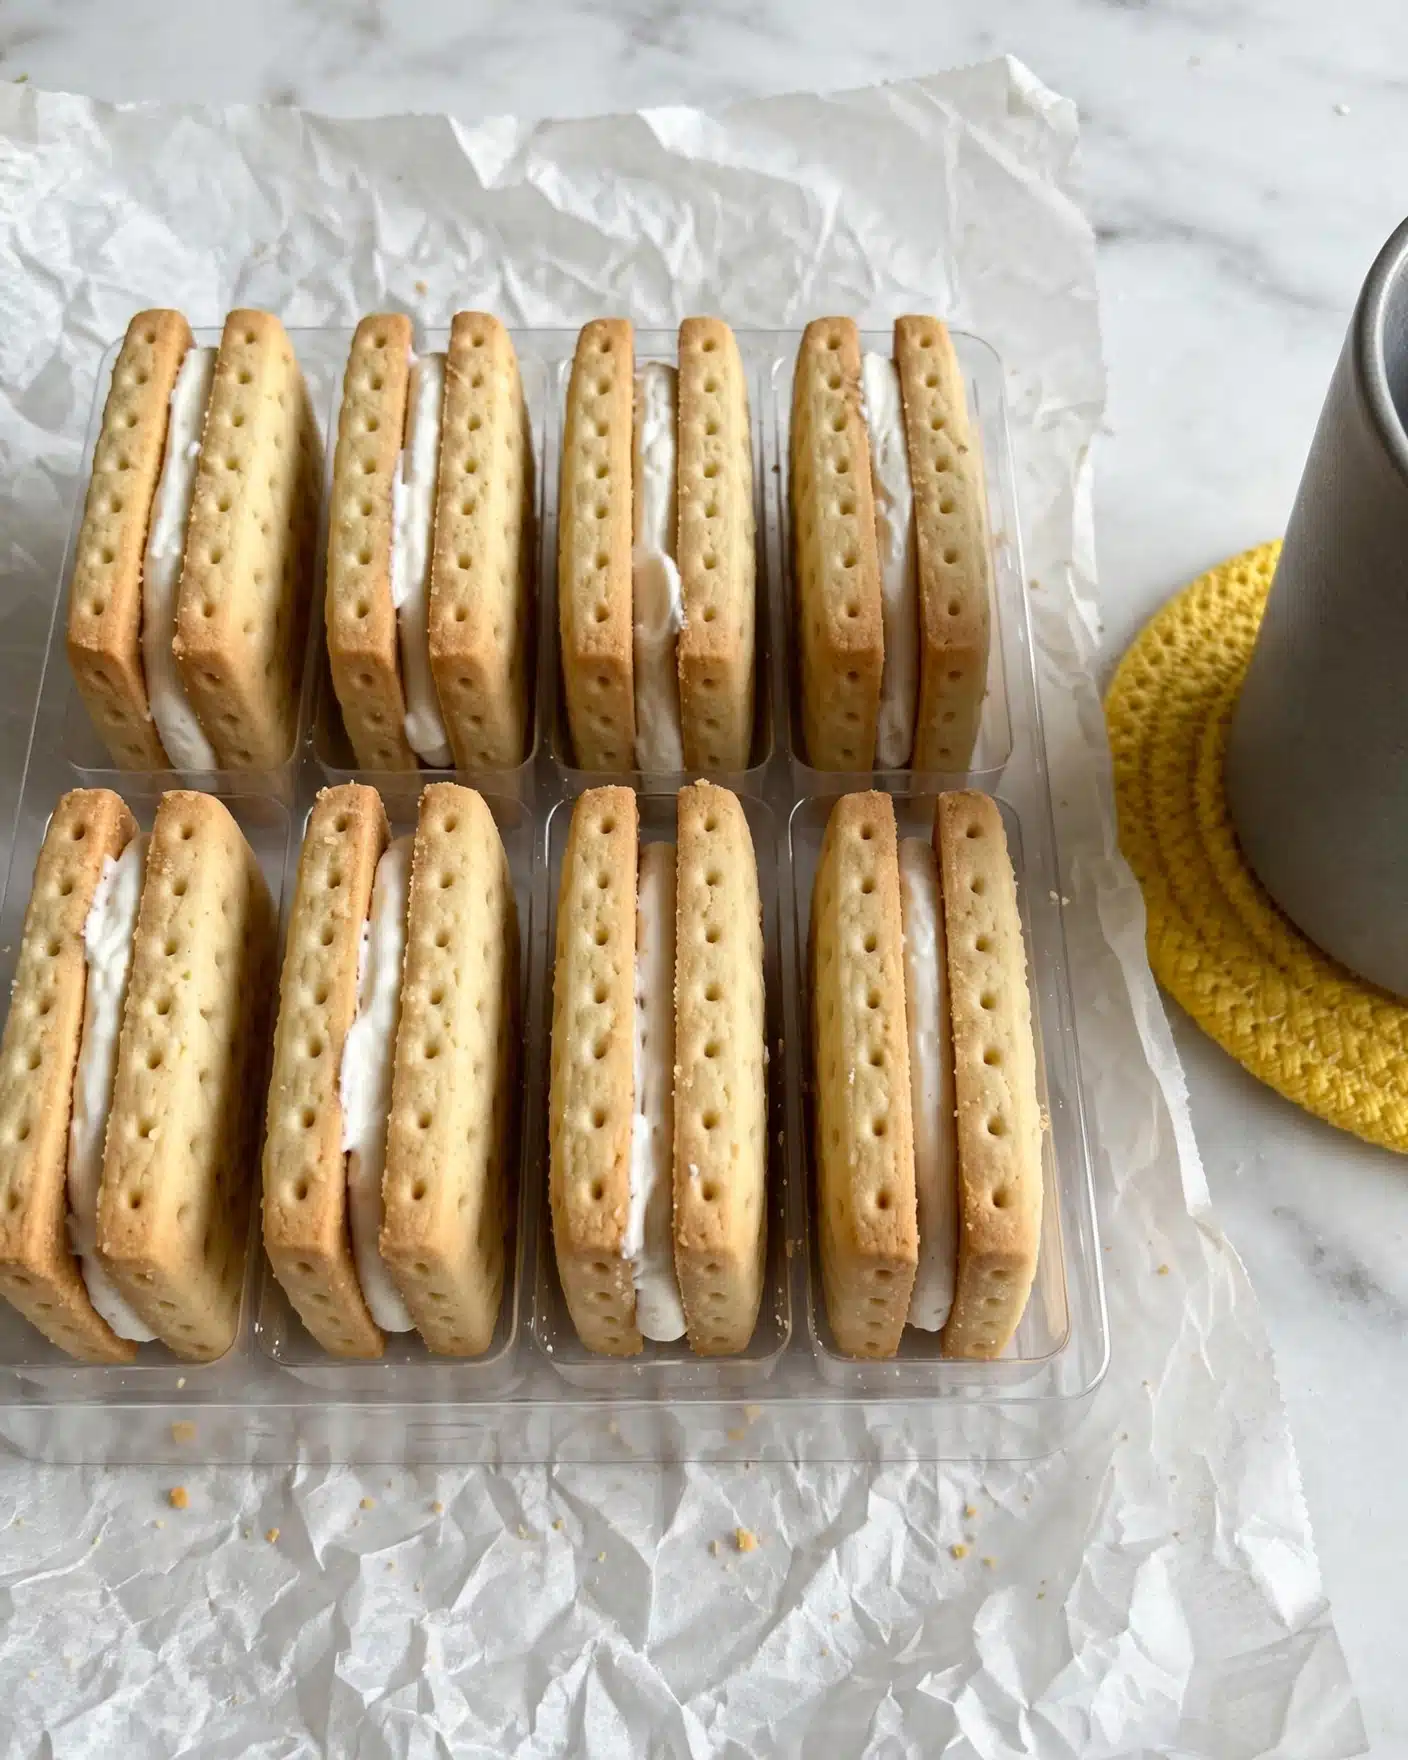
This recipe is wonderfully simple, relying on just a handful of essential ingredients that come together to create a deliciously spooky treat. Each ingredient plays its part in the overall taste and texture, whether it’s the creamy candy coating enveloping the cookies or the colorful mini M&Ms bringing those playful eyes to life.
- Vienna Fingers: These vanilla cookies provide the perfect base with their crisp texture and subtle sweetness that holds up well to the coating.
- White candy coating: This smooth coating creates that classic mummy bandage look and adds a creamy sweetness to complement the cookie.
- Mini M&Ms: These tiny candies serve as cute, colorful eyes, giving each cookie a fun personality and just the right amount of chocolate.
Directions
Step 1: Begin by melting the white candy coating according to the package instructions. Make sure you do this gently, either in short bursts in the microwave or over a double boiler, to avoid burning the candy.
Step 2: Once melted, use a fork to dip each Vienna Finger cookie completely into the candy coating, turning it to cover all sides. This keeps the cookies looking smooth and fully wrapped like little mummies.
Step 3: Carefully place each coated cookie on waxed paper to set. You can chill them in the fridge for about 30 minutes to speed up the hardening process or leave them on the counter for at least an hour.
Step 4: After the coating has set, melt more candy coating and transfer it into a ziplock bag. Snip a tiny corner off and drizzle the coating over each cookie to create the signature mummy bandage stripes.
Step 5: Before the drizzle sets, press two mini M&Ms onto each cookie to form the eyes. Allow everything to harden completely before serving. Enjoy your adorable, spooky treats!
Servings and Timing
This Mummy Cookies Recipe yields about 26 servings, perfect for sharing at a party or handing out to neighbors and friends. Prep time is minimal—about 15 minutes to melt, dip, and set the base coating. The actual cook time is pretty short since you’re mainly waiting for the candy coating to harden, roughly 30 minutes in the fridge or an hour at room temperature. Total time from start to finish is about 45 minutes, making these treats doable for even last-minute festivities without stress or fuss.
How to Serve This Mummy Cookies Recipe
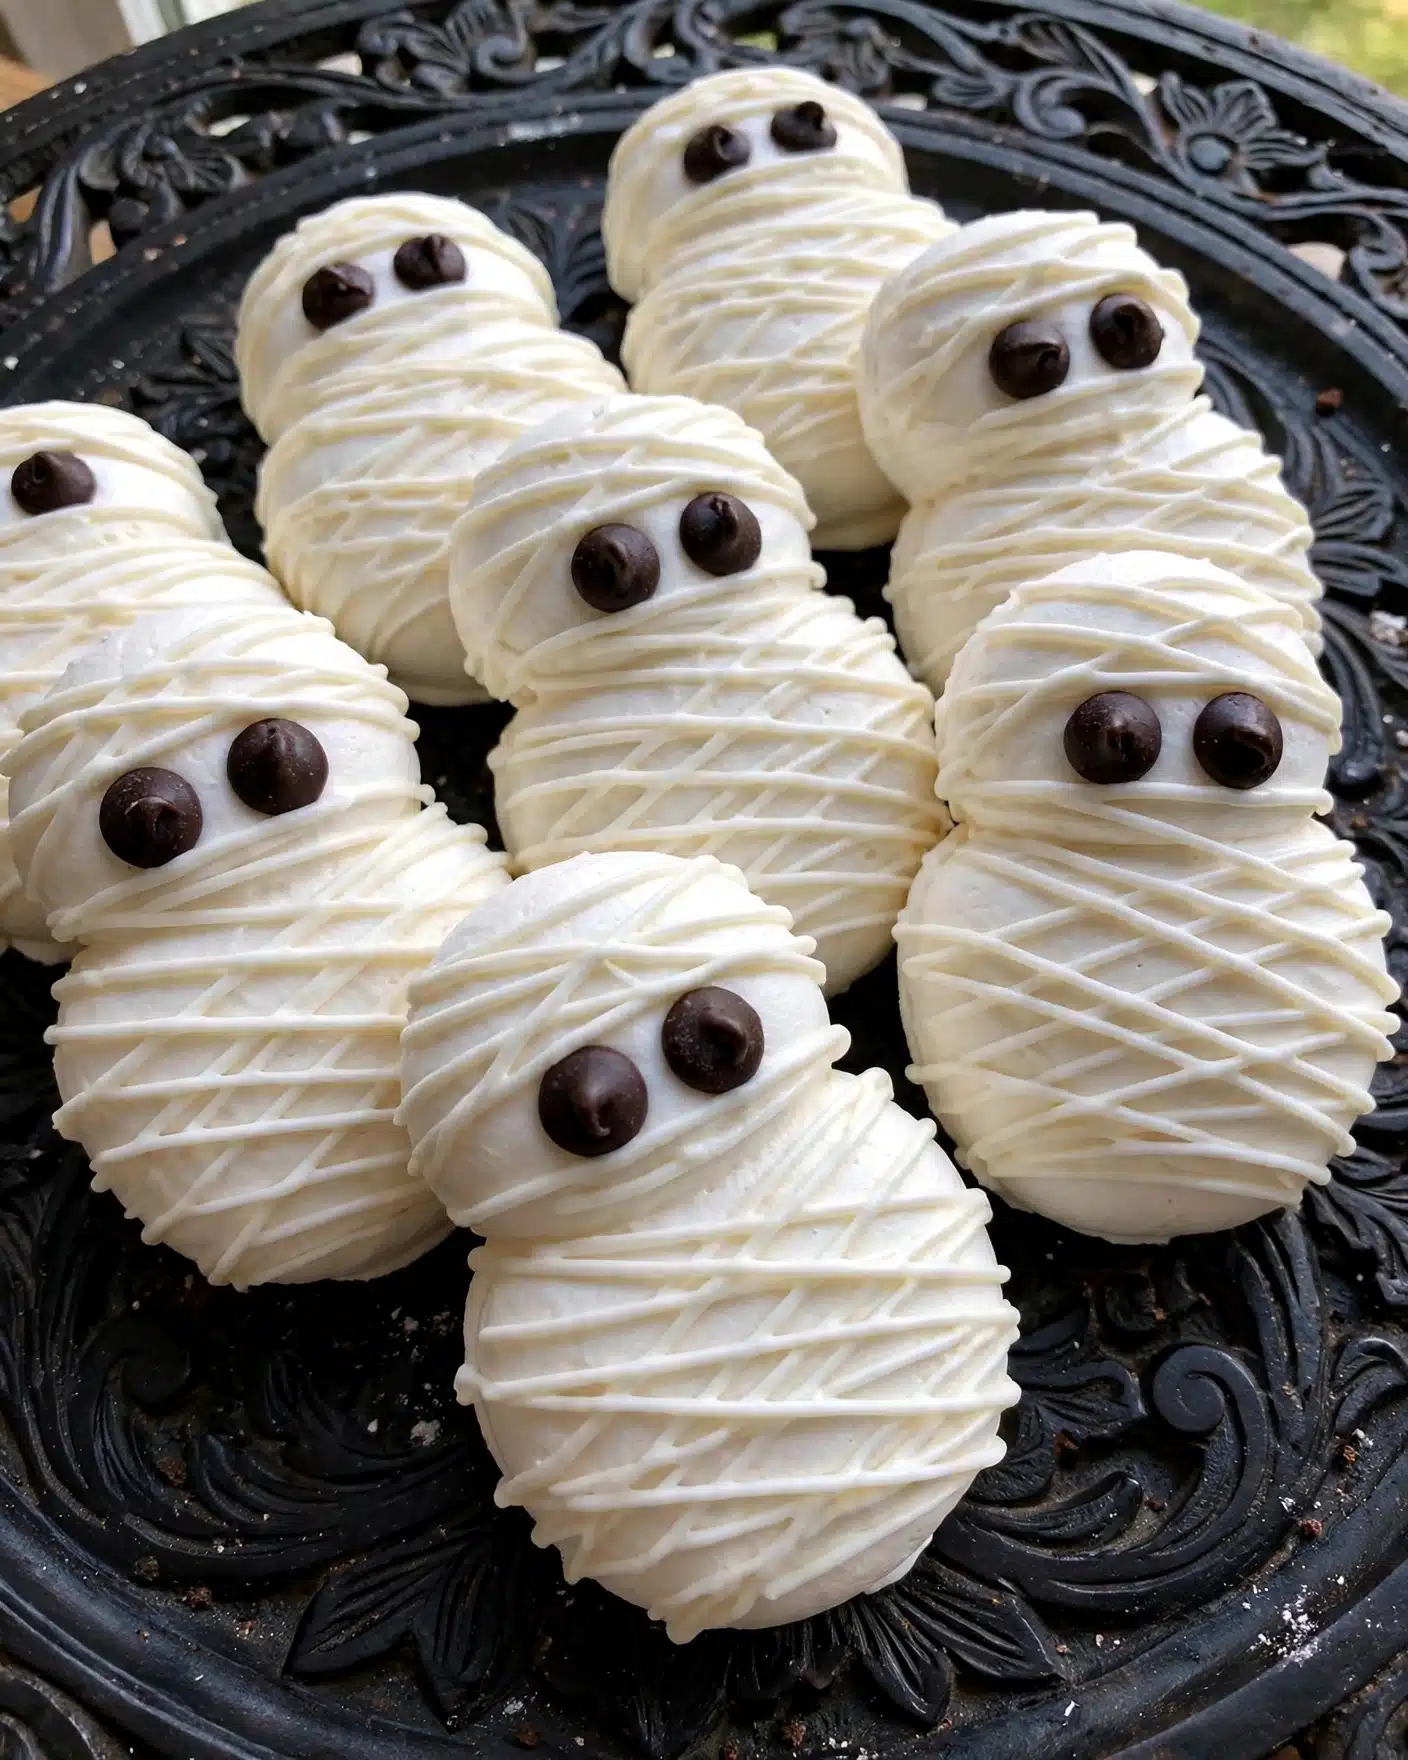
I love serving these mummy cookies with a few different accompaniments to really bring out their magic. They’re fantastic alongside a simple fruit punch or a warm cup of spiced apple cider, which complements the sweet vanilla and candy flavors beautifully. If you want to get extra festive, try arranging the cookies on a dark platter with some autumn leaves or small pumpkins scattered around to create a spooky display that everyone will admire.
For garnishing, I often sprinkle a little edible glitter or colored sugar around the base of the cookies to add sparkle that catches the light—making the “bandages” look almost enchanted. Serve them at room temperature so the candy coating has that perfect snap without being too hard to bite into. These cookies work great as dessert in a family dinner setting, a Halloween party snack, or even as a playful afterschool treat all fall long.
When plating, I recommend giving each person 2-3 cookies, depending on how many other sweets you have, arranged side by side to show off the mummy eyes peeking out. It’s a small touch, but I notice it always brings smiles. These cookies transform any occasion into a little celebration of fun flavors and festive joy!
Variations
One of my favorite things about the Mummy Cookies Recipe is how adaptable it can be. If you’re looking to mix things up, you can swap the vanilla Vienna Fingers for chocolate wafers or even ginger snaps for a spicier twist that still holds up well under the coating. This changes the flavor profile while keeping the crunchy base I love so much.
If you need dietary modifications, I’ve experimented using gluten-free cookies and dairy-free white chocolate coatings, and they still turn out wonderfully. Look for vegan candy melts to make the recipe fully plant-based, and don’t be shy about customizing the eyes using small candy dots or edible markers. These switches allow everyone to enjoy the fun without compromise.
For an extra flavor boost, I sometimes add a drop of peppermint or almond extract to the melted candy coating before dipping. This adds a subtle, refreshing note that pairs unexpectedly well with the sweet cookies. Although the traditional method is dipping and drizzling, you could try brushing the coating on with a pastry brush for a lighter bandage effect. It’s a fun way to personalize your mummies and put your own spin on this classic treat.
Storage and Reheating
Storing Leftovers
If you have any leftovers, I recommend storing your mummy cookies in an airtight container at room temperature. Layer the cookies with parchment paper or waxed paper between to prevent sticking. They usually keep fresh and delicious for up to a week, which gives you plenty of time to enjoy them without losing their signature crispness and the glossy candy coating.
Freezing
If you want to store these cookies longer, freezing is a great option. Place them in a single layer on a baking sheet first to freeze individually, then transfer to a freezer-safe airtight container or ziplock bag with parchment paper layered in between. They can keep well frozen for up to 2 months. When you’re ready to enjoy them, just thaw at room temperature—no need to heat them up, as that can cause the candy coating to lose its texture.
Reheating
Because these are coated with candy melts, reheating isn’t necessary or recommended, as it can melt the coating and alter the texture. If you want to freshen up the crispness after being stored, just bring the cookies out of their container and let them come to room temperature naturally. This will help maintain their perfect balance of crunch and creamy sweetness without any extra effort.
FAQs
Can I use regular white chocolate instead of white candy coating?
While regular white chocolate can work, it’s often less stable for dipping because it has a higher cocoa butter content and may seize or melt inconsistently. White candy coating, or candy melts, are formulated to melt smoothly and harden with a nice shine, making them ideal for coating cookies like these mummies.
How do I prevent mini M&Ms from falling off the cookies?
The trick is to press the mini M&Ms gently into the drizzle of melted candy coating right after you add the stripes, before it hardens. This sticky surface acts like glue to hold the eyes in place securely as the coating sets.
Can I decorate the cookies ahead of time?
Absolutely! You can prepare the cookies and decorate them a day or two in advance. Just store them in an airtight container at room temperature to keep the candy coating intact and preserve freshness until you’re ready to serve.
What if I don’t have a ziplock bag for drizzling?
You can use a small piping bag or even a plastic squeeze bottle if you have one. If not, carefully using a spoon or butter knife to drizzle thin lines can work too, though it takes a bit more practice to get the same effect.
Are Vienna Fingers essential or can I use other cookies?
Vienna Fingers are perfect because of their shape and texture, but you can substitute with similar vanilla wafer cookies or any finger-shaped cookie you like. Just ensure they hold up to dipping without breaking easily for best results.
Conclusion
I hope you’re as excited as I am to give this Mummy Cookies Recipe a try. It’s one of those simple, charming treats that always brings joy and sparks smiles whenever I serve them. Whether you’re celebrating Halloween or just want to add a bit of whimsy to your dessert table, these mummies make a fantastic choice. Grab your ingredients, get dipping, and enjoy creating your own batch of these fun, festive cookies. I promise they’ll be a hit!
PrintMummy Cookies Recipe

These spooky and fun Mummy Cookies are perfect for Halloween parties or festive treats. Vanilla Vienna Fingers are coated in a smooth white candy coating to resemble mummy wrappings, then decorated with mini M&M eyes for a playful and delicious effect. Easy to make and perfect for sharing!
- Prep Time: 10 minutes
- Cook Time: 10 minutes (melting and coating)
- Total Time: 45 minutes
- Yield: 26 cookies
- Category: Dessert
- Method: No-Cook
- Cuisine: American
Ingredients
Cookie Base
- 26 Vienna Fingers (vanilla cookies)
Candy Coating
- 2 bags white candy coating (approximately 16 ounces each)
Decorations
- 52 Mini M&Ms
Instructions
- Melt the candy coating: Begin by melting the white candy coating according to the package instructions until smooth and creamy, usually in a microwave-safe bowl or double boiler.
- Coat the cookies: Using a fork, dip each Vienna Finger thoroughly into the melted candy coating, ensuring all sides are covered. Carefully place the coated cookie onto waxed paper and repeat this process for all 26 cookies.
- Let the coating set: Allow the candy coating to harden by placing the cookies in the refrigerator for about 30 minutes, or leave them on the counter for at least 1 hour until fully set.
- Drizzle and decorate: Melt additional candy coating and pour it into a zip-top bag. Snip off a small corner and drizzle the coating over the cookies to create a mummy wrap effect. Immediately add two mini M&Ms to each cookie for the eyes.
- Final setting: Allow the drizzle and eyes to set completely before serving. Enjoy your festive mummy cookies!
Notes
- Use waxed paper to prevent sticking while the candy coating sets.
- The mini M&Ms add a fun touch for eyes but can be substituted with small candies or edible decorations.
- If candy coating thickens while decorating, gently reheat to restore smoothness.
- Store cookies in an airtight container at room temperature for up to 3 days for best freshness.




Leave a Reply