
I absolutely love making this Homemade Caramel Corn Recipe because it brings back all those cozy memories of family movie nights and festive gatherings. The perfect balance of sweet, buttery caramel coating every crispy kernel makes it utterly addictive. I’ve found it’s a treat that’s not only delicious but also surprisingly straightforward to prepare, so I’m always thrilled to share it with friends and family. Once you try it, I’m confident it’ll become your new favorite snack too!
Why You'll Love This Homemade Caramel Corn Recipe
What really makes this Homemade Caramel Corn Recipe special to me is its fantastic flavor profile. The caramel is rich yet not overwhelmingly sweet, with a buttery, slightly toasted edge that complements the light, airy popcorn perfectly. I love that each bite has that satisfying crunch, and the caramel clings just right without making the popcorn soggy or sticky. It’s that kind of snack that keeps you reaching for more, one handful after another.
Beyond the taste, what makes this recipe stand out is how easy it is to make at home. It only requires a handful of ingredients, and while it takes a bit of patience during baking, the hands-on time is minimal. It’s the perfect treat for special occasions like holiday parties, game nights, or just a cozy weekend indulgence. I always feel such pride serving this vibrant, golden snack because it looks as incredible as it tastes—making it a guaranteed crowd-pleaser!
Ingredients You'll Need
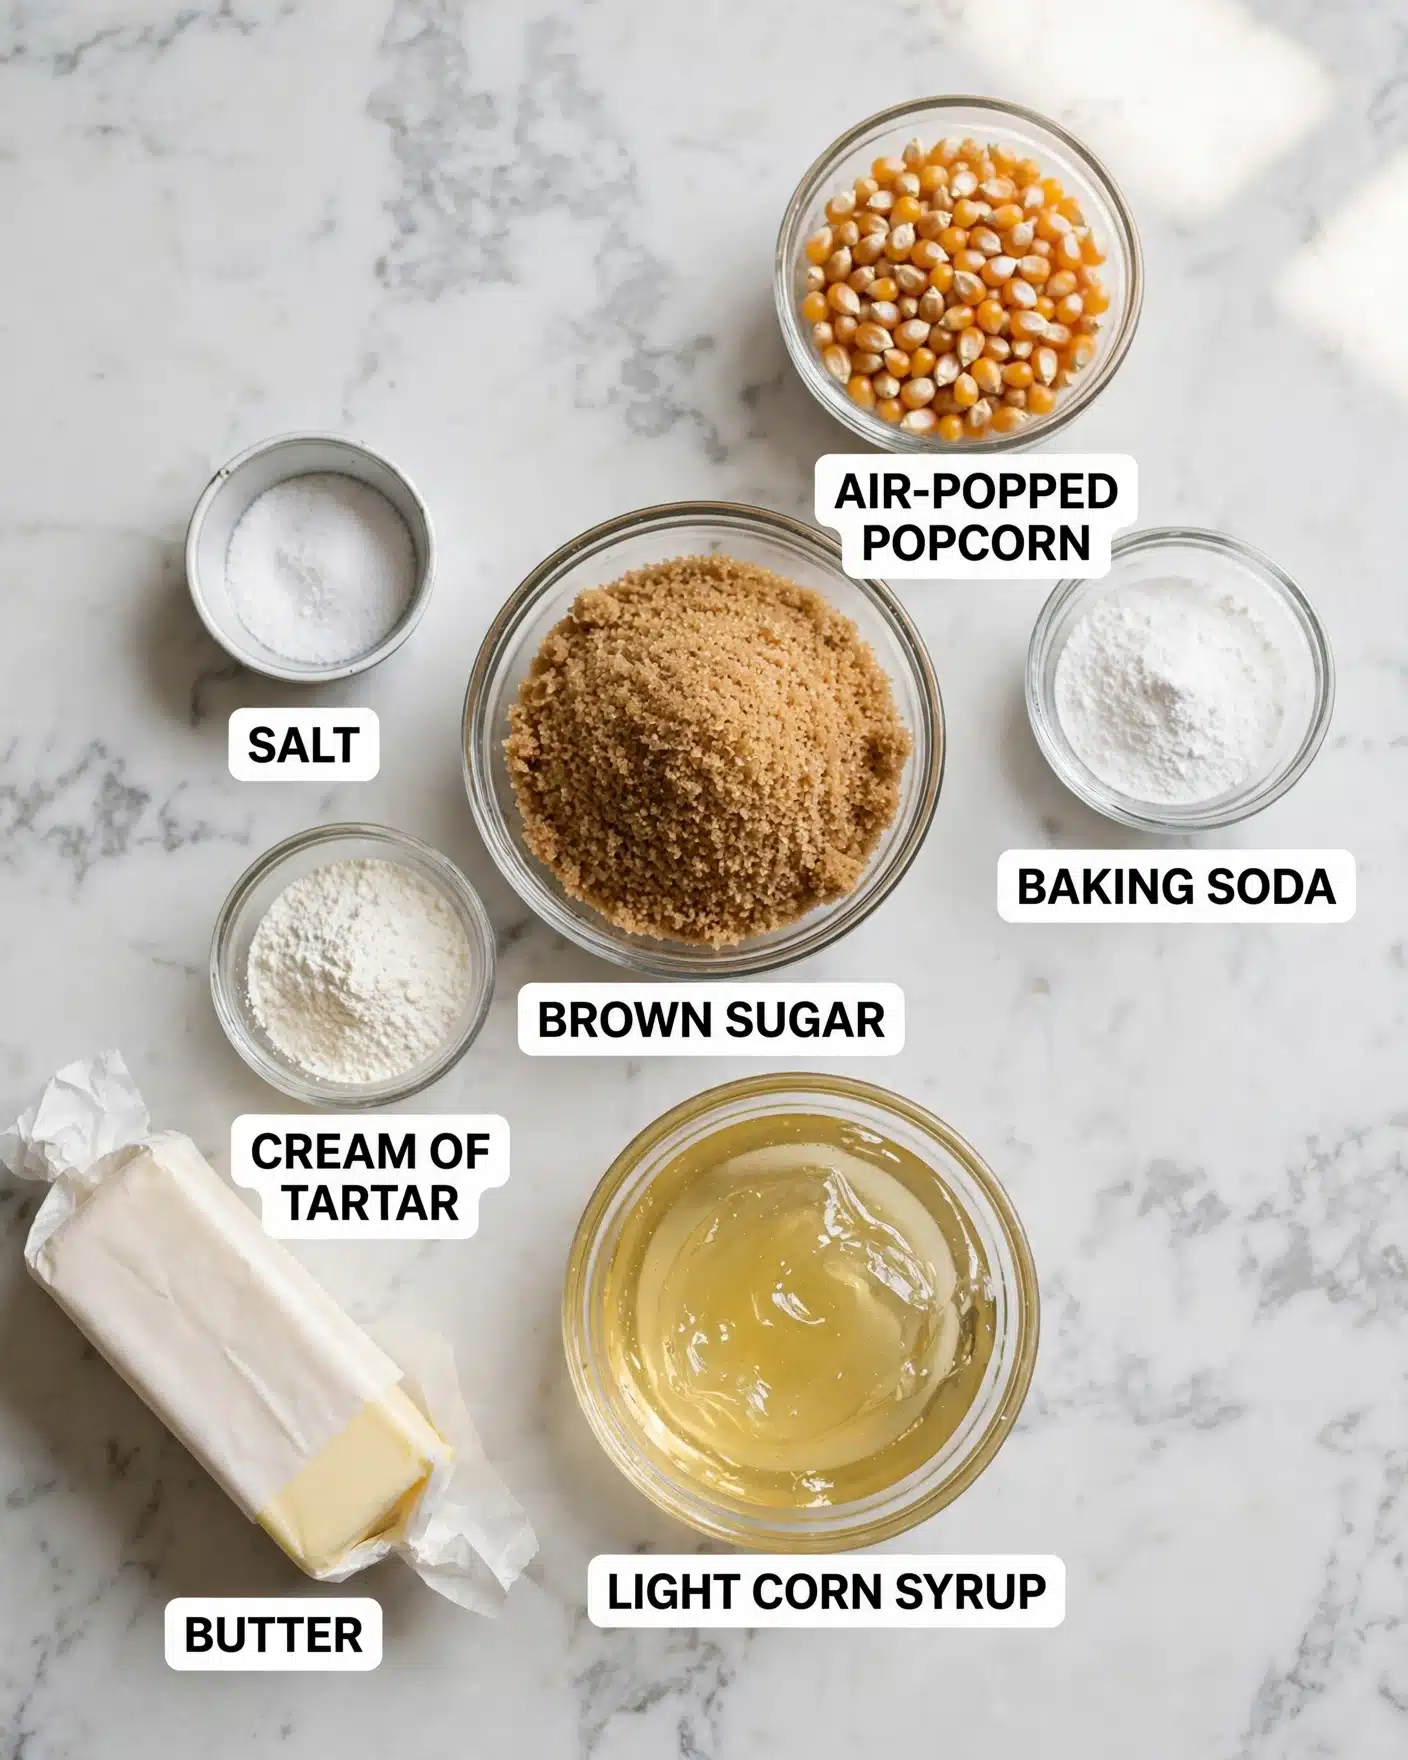
All the ingredients in this recipe are simple staples, but each one plays a crucial role in the final flavor and texture of the caramel corn. From the buttery richness to the subtle saltiness and that perfect glossy caramel coating, these ingredients come together in harmony to create something truly magical.
- 10–11 cups of air-popped popcorn: I always use air-popped popcorn to keep it light and avoid excess oil or moisture.
- 1 cup packed light brown sugar: This adds a deep, molasses-like sweetness that's more complex than white sugar.
- ¼ cup light corn syrup: The corn syrup prevents crystallization, giving the caramel that smooth, shiny finish.
- ½ cup unsalted butter: Butter brings richness and creaminess to the caramel coating.
- ½ teaspoon salt: Just enough salt to balance the sweetness and enhance the flavors.
- ⅛ teaspoon cream of tartar: This helps stabilize the caramel so it’s perfectly chewy and glossy.
- ½ teaspoon baking soda: Adds that classic light, airy texture as the caramel bubbles up when mixed in.
Directions
Step 1: Preheat your oven to 200°F (93°C). Line one or two 12×17-inch baking sheets with silicone baking mats or parchment paper so your caramel corn doesn’t stick and baking sheets are easy to clean.
Step 2: Pour the air-popped popcorn into your largest mixing bowl or spread it evenly on the prepared baking sheets. Both methods work well, so choose whatever is easiest for you.
Step 3: In a medium saucepan, combine the brown sugar, light corn syrup, unsalted butter, salt, and cream of tartar over medium heat. Stir constantly as the butter melts and the mixture starts to simmer around the edges.
Step 4: Once it begins to bubble, stop stirring and let it cook for 4 minutes. If you have a candy thermometer, aim for the caramel to reach 234–235°F (112–113°C). This temperature ensures the caramel sets perfectly without being too hard or too soft.
Step 5: Remove the saucepan from heat immediately and stir in the baking soda. The mixture will foam up dramatically, almost doubling in volume—this is completely normal and part of what makes the caramel light and crunchy. Be careful as it will be very hot.
Step 6: Pour the bubbly caramel mixture over your popcorn. Using a large spoon or spatula, gently stir to coat every kernel evenly. It takes patience because the caramel thickens quickly; keep stirring slowly and thoroughly until all the popcorn is glossy and well-covered.
Step 7: Spread the caramel-coated popcorn evenly on the prepared baking sheet(s) so it bakes uniformly. Pop it in the oven for 1 hour, removing it every 20 minutes to gently stir and break up any clumps.
Step 8: Let the caramel corn cool on the baking sheet for at least 30 minutes. The caramel hardens as it cools, giving you that perfect crunchy texture. Once cool enough to handle, break apart any large clusters and enjoy!
Servings and Timing
This recipe makes approximately 10 servings, perfect for sharing with family or guests. Prep time takes about 15 minutes to gather ingredients and pop the corn, while the cooking and baking time totals around 1 hour and 5 minutes. Including cooling time, you’re looking at about 1 hour and 20 minutes from start to finish. The resting period is essential because it allows the caramel to fully set, so resist the temptation to dig in too soon!
How to Serve This Homemade Caramel Corn Recipe
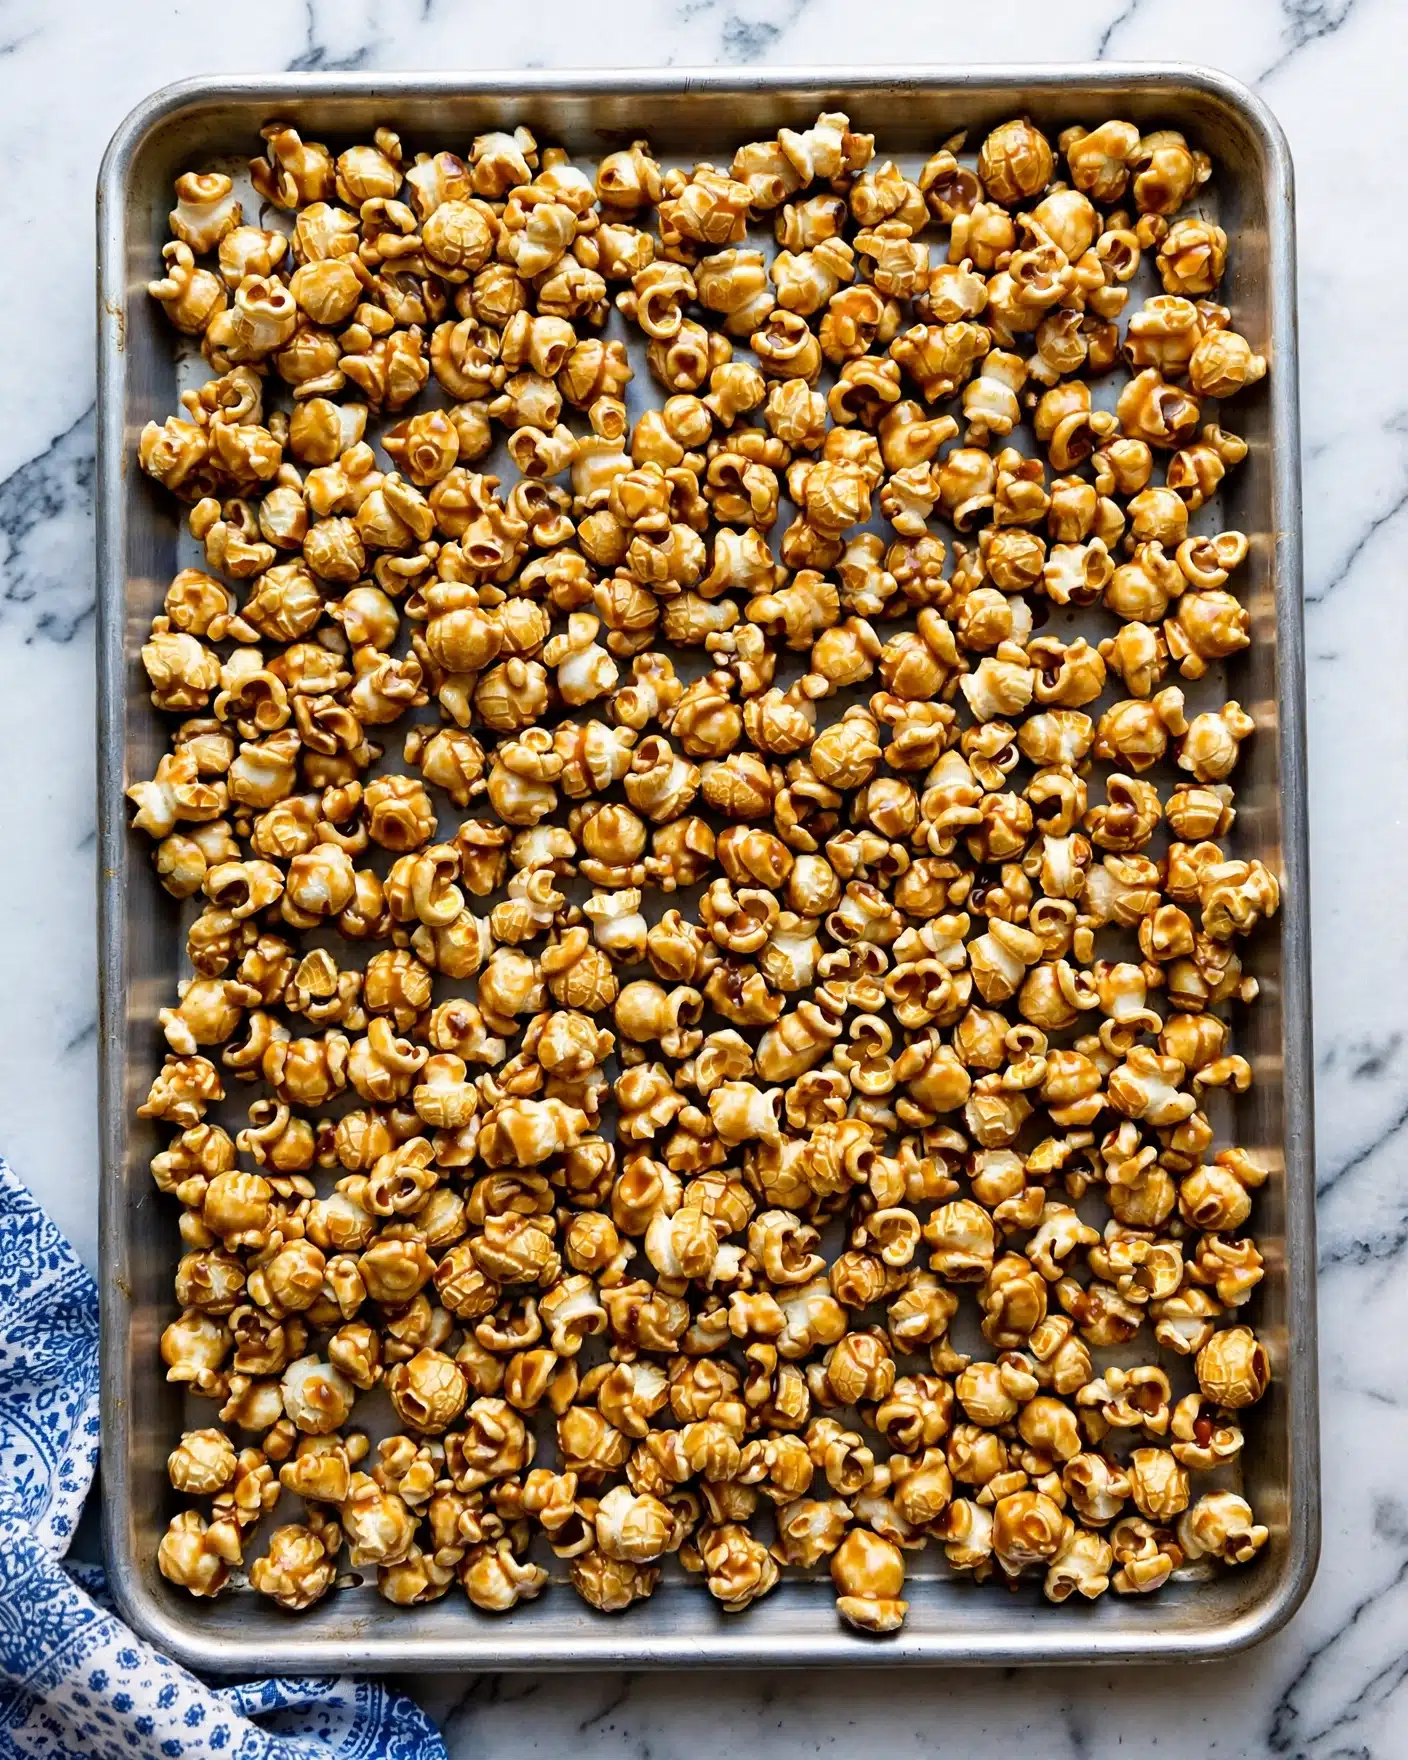
I love serving this Homemade Caramel Corn Recipe at casual gatherings because it’s such an inviting treat that everyone can snack on. It pairs wonderfully with fresh fruit or subtly savory cheeses to balance the sweetness. Imagine a cozy night with a bowl of warm caramel corn alongside sliced apples or pear – it’s an easy way to elevate your snack game.
For presentation, I like to place the caramel corn in rustic wooden bowls or colorful ceramic dishes to really highlight the golden color of the caramel. Sprinkling a few sea salt flakes on top just before serving adds a sophisticated touch that guests always notice and appreciate. This also adds a nice textural contrast that awakens your taste buds.
If you’re serving this at a party or holiday event, consider placing small individual portions in cute paper cones or glass jars for an inviting, grab-and-go feel. This caramel corn is best enjoyed at room temperature so it’s perfectly crisp and not too sticky. I usually make it a bit ahead of time, so the flavors have time to meld and the texture is spot on when served.
Variations
Over time, I've had fun experimenting with this caramel corn recipe to suit different tastes or dietary needs. For example, you can swap light corn syrup with maple syrup or honey for a hint of unique flavor, although the texture may be slightly different. For a vegan version, I use coconut oil in place of butter and carefully select a vegan-friendly syrup, which still yields a great result.
If you enjoy a bit of contrast, adding chopped toasted nuts or a sprinkle of cinnamon or pumpkin spice to the caramel before baking can really elevate the flavor complexity. For those who prefer a saltier snack, increasing the salt slightly or finishing with a dusting of smoked paprika can make for a fantastic twist.
While baking is my favorite method for evenly coating and crisping the caramel corn, I’ve occasionally used the stovetop-only method, stirring the caramel-coated popcorn gently for 10 minutes before spreading it to cool. It's quicker but less crunchy. So, depending on your time and texture preference, feel free to adapt the approach.
Storage and Reheating
Storing Leftovers
Once cooled completely, I store leftover caramel corn in an airtight container at room temperature. I find that storing it this way keeps it fresh and crunchy for up to two weeks. Using a glass or BPA-free plastic container with a tight seal works best to prevent moisture from softening the caramel coating.
Freezing
While caramel corn freezes well in theory, I personally don’t recommend freezing it because the texture can change when thawed, often becoming sticky or chewy rather than crisp. However, if you want to freeze it, place cooled caramel corn in a heavy-duty freezer bag, remove as much air as possible, and freeze for up to 2 months. Thaw completely at room temperature before enjoying.
Reheating
To refresh caramel corn that has lost some of its crispness, I gently reheat it in a 250°F (120°C) oven for about 5 to 10 minutes. Spread it evenly on a baking sheet to ensure even warming. Avoid microwave reheating since it causes steam and makes the caramel clump or get sticky. This quick bake restores the crunch and revives the flavor beautifully.
FAQs
Can I use microwave popcorn for this recipe?
You can use microwave popcorn, but I recommend air-popped popcorn because microwave varieties often contain oil and salt already, which can interfere with the caramel’s texture and flavor. Air-popped popcorn provides the lightest, crispiest base.
What is the purpose of cream of tartar in caramel corn?
Cream of tartar acts as an acid that prevents sugar crystals from forming during cooking, making your caramel smoother and preventing graininess. It helps ensure a shiny, chewy coating rather than a brittle or gritty one.
How do I prevent the caramel from burning?
Keep your heat at medium and stir constantly until the mixture simmers, then stop stirring and monitor the cooking time carefully. Using a candy thermometer can help you hit the perfect temperature of about 234–235°F (112–113°C), ensuring your caramel is perfectly cooked without burning.
Can I add nuts or other mix-ins?
Absolutely! I love adding chopped nuts like pecans or almonds just before baking, or even some toasted coconut flakes. Just fold them into the popcorn before coating with caramel to create exciting flavor and texture combinations.
How do I store the caramel corn if I want to make it ahead?
Make sure the caramel corn is completely cooled before storing in an airtight container at room temperature. It stays fresh for up to two weeks, making it a fantastic make-ahead snack for parties or gifts.
Conclusion
I’m so excited for you to try this Homemade Caramel Corn Recipe because it’s a wonderful way to treat yourself and your loved ones to something that’s both nostalgic and delicious. It’s straightforward enough for any home cook, yet so special in taste and texture that it feels like a real celebration in every bite. Once you make it, I hope you’ll find yourself reaching for this recipe again and again — I know I do!
PrintHomemade Caramel Corn Recipe
This homemade caramel corn recipe delivers a sweet, crunchy treat made from air-popped popcorn coated in a rich, buttery caramel sauce. Slow-baked to perfection, the caramel hardens into a delightful glaze covering every kernel for a nostalgic snack that's perfect for movie nights or gifting.
- Prep Time: 15 minutes
- Cook Time: 1 hour 5 minutes
- Total Time: 1 hour 20 minutes
- Yield: 10 servings
- Category: Snack
- Method: Baking
- Cuisine: American
Ingredients
Popcorn
- 10–11 cups (about 70–75g) air-popped popcorn
Caramel Sauce
- 1 cup (200g) packed light brown sugar
- ¼ cup (80g) light corn syrup
- ½ cup (113g) unsalted butter
- ½ teaspoon salt
- ⅛ teaspoon cream of tartar
- ½ teaspoon baking soda
Instructions
- Preheat Oven: Preheat your oven to 200°F (93°C) and line one or two 12×17-inch baking sheets with silicone baking mats or parchment paper to prepare for baking.
- Prepare Popcorn: Place the air-popped popcorn into the largest bowl you have or spread it evenly onto the prepared baking sheets.
- Make Caramel Sauce: In a medium saucepan over medium heat, combine light brown sugar, light corn syrup, unsalted butter, salt, and cream of tartar. Stir constantly as the butter melts and the mixture comes to a simmer. Once it starts bubbling around the edges, let it bubble without stirring for 4 minutes, or until the caramel reaches 234–235°F (112–113°C).
- Add Baking Soda: Remove the caramel from the heat and immediately stir in the baking soda. The mixture will bubble up and become frothy; this is normal. Be cautious as it will be very hot.
- Coat Popcorn: Pour the hot caramel over the popcorn. Gently stir with a large spoon or spatula to coat all the popcorn evenly, slowly and patiently turning several times as the caramel begins to harden. Spread the coated popcorn evenly on the baking sheet(s).
- Bake: Bake the caramel-coated popcorn in the preheated oven for 1 hour, stirring gently every 20 minutes to coat evenly and prevent burning.
- Cool and Serve: Allow the caramel corn to cool on the baking sheet for at least 30 minutes. The caramel will harden as it cools. Once cool enough, break apart any large clusters.
- Store: Store the caramel corn in an airtight container once completely cooled. It stays fresh for up to 2 weeks, making it ideal to prepare ahead of time.
Notes
- Using light corn syrup helps prevent sugar crystallization in the caramel for a smooth texture.
- Be very careful when stirring the hot caramel, as it can cause severe burns.
- If you don’t have a candy thermometer, monitor the caramel closely to avoid burning; it should bubble gently for the specified time.
- Stirring every 20 minutes during baking ensures even caramel coating and prevents burning.
- For extra flavor, you can sprinkle a little sea salt over the popcorn before baking to make salted caramel corn.
- This recipe is best made in advance since it stores well and tastes delicious after resting.


Leave a Reply