
I absolutely love sharing this 3-Ingredient Chili Cheese Dip Recipe because it delivers that irresistible combination of creamy, cheesy, and hearty chili flavors in such a straightforward way. To me, it's the perfect dish that brings everyone together, whether we're snacking during game night or craving something warm and comforting on a chilly evening. I promise, once you try this dip, it will quickly become one of your favorite go-to recipes for effortless entertaining or cozy nights in.
Why You'll Love This 3-Ingredient Chili Cheese Dip Recipe
I’m always on the lookout for recipes that taste like a million bucks without requiring hours in the kitchen, and that’s exactly what draws me to this 3-Ingredient Chili Cheese Dip Recipe. The flavor profile is a perfect balance: creamy richness from the cream cheese, a smoky, slightly spicy kick from the chili with beans, and that melty, gooey goodness from the Mexican cheese. Every bite hits that satisfying spot between hearty and comforting, and it always gets compliments from my family and friends.
What makes this recipe truly stand out to me is how incredibly easy it is to prepare. I mean, just three ingredients and under 30 minutes? Yes, please! It’s fantastic for last-minute gatherings or when I want a quick snack that doesn’t require fussing over numerous steps or fancy tools. Plus, it’s so versatile — I serve it at casual parties, cozy movie nights, and even as a fun side dish during a weeknight dinner. Honestly, it’s one of those recipes I keep coming back to because it never disappoints.
Ingredients You'll Need
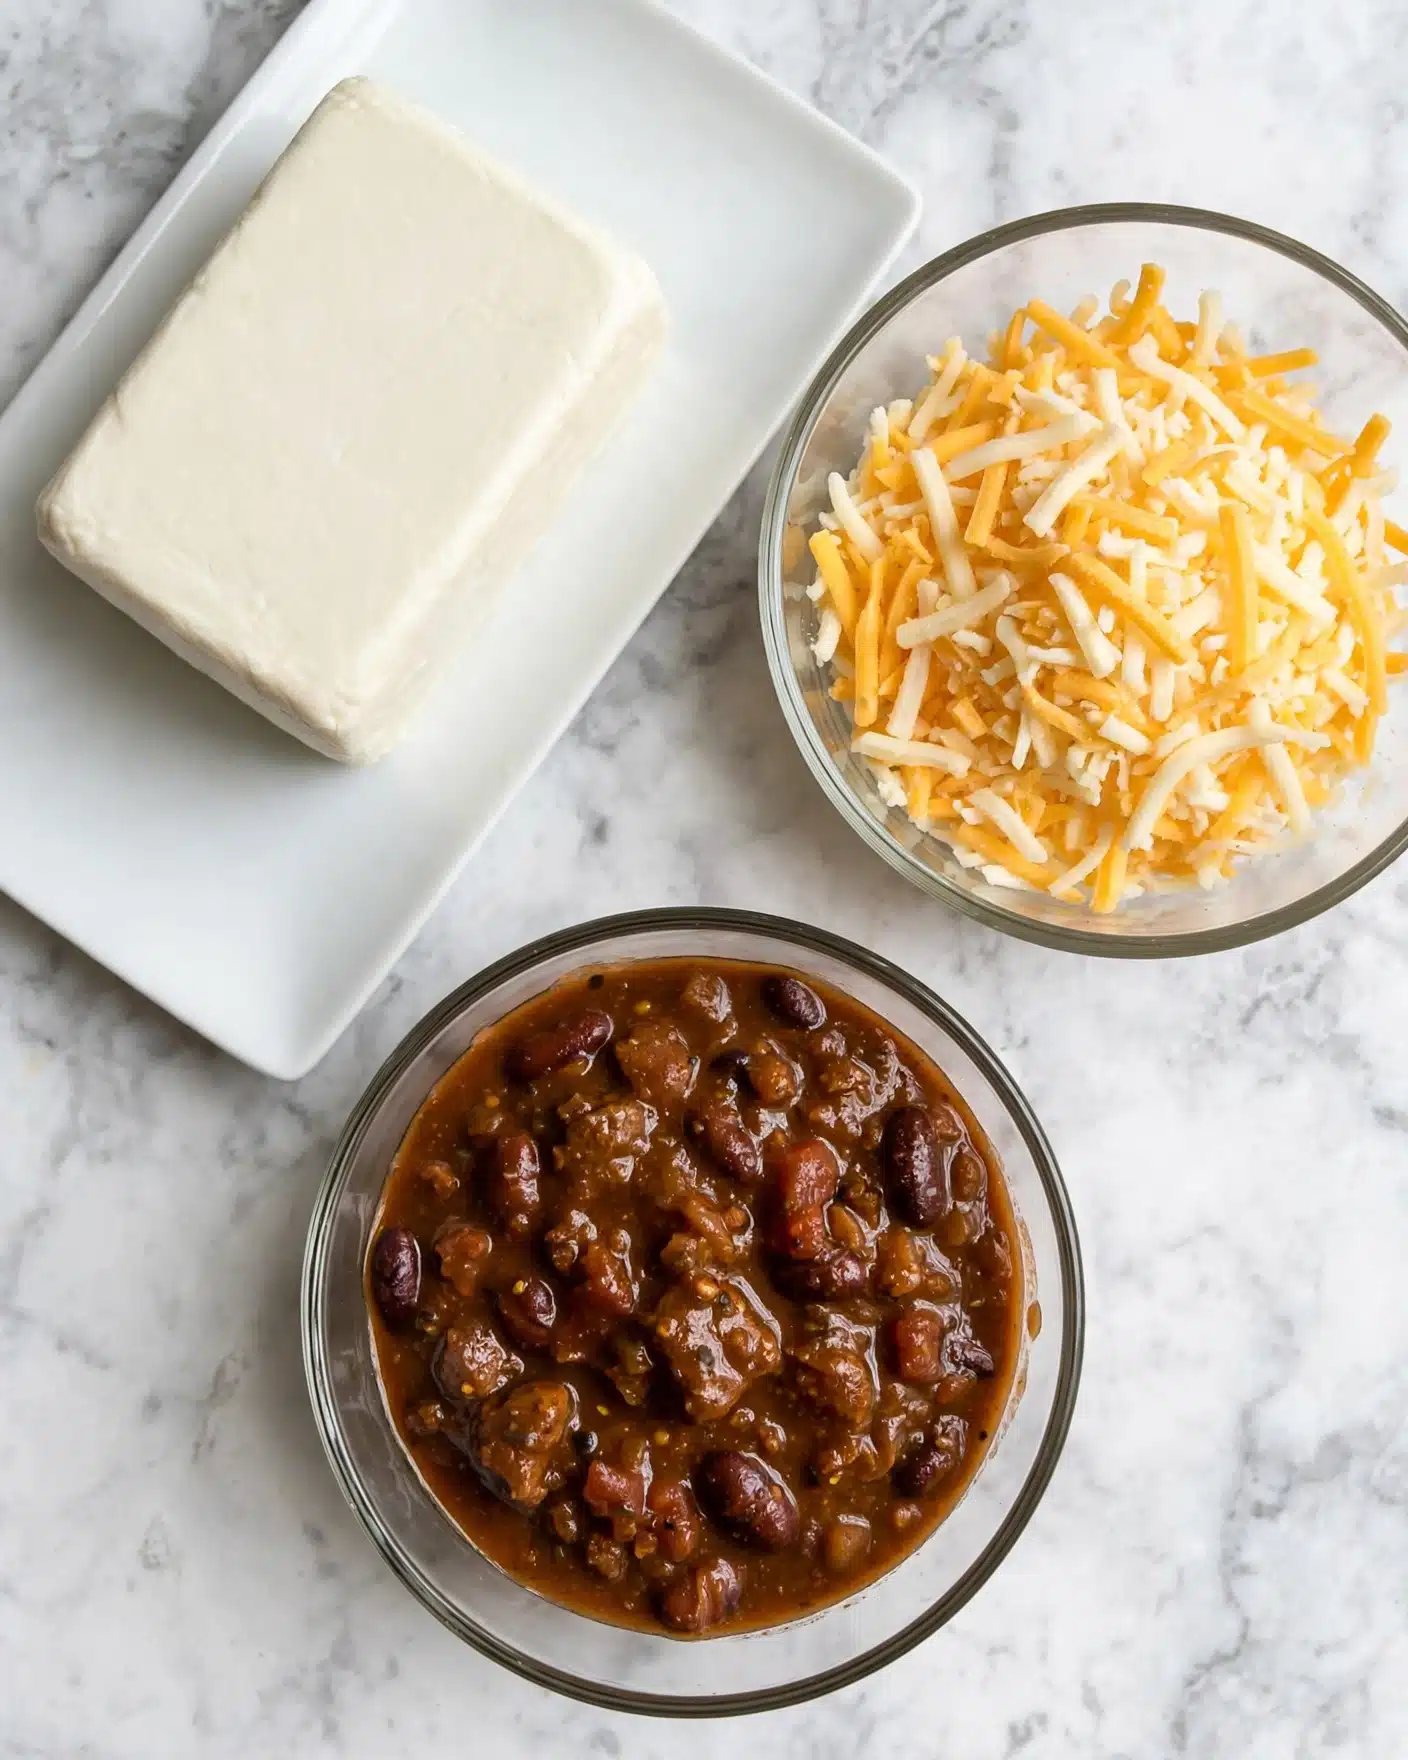
The magic of this recipe lies in its simplicity. Each ingredient plays an essential role in creating a dip that’s creamy, flavorful, and perfectly textured. The cream cheese gives it that smooth base, the Mexican cheese adds meltiness and a touch of richness, while the chili with beans brings a hearty, savory depth that turns this dish into something truly satisfying.
- Cream cheese: Using room temperature cream cheese makes spreading it easier and ensures a silky smooth base layer.
- Mexican shredded cheese blend: This melty cheese adds a great gooey texture and a mild, savory flavor that complements the chili perfectly.
- Hormel chili with beans: The chili is the heart of the dip, delivering that rich, seasoned bean and meat combo with just the right amount of spice and texture.
Directions
Step 1: Preheat your oven to 350°F (175°C) and spray a 1 ½ quart baking dish with cooking spray. This will help prevent the dip from sticking and make cleanup a breeze.
Step 2: Take the cream cheese at room temperature and spread it evenly across the bottom of the baking dish. Then sprinkle on half of the shredded Mexican cheese to create a flavorful layer beneath the chili.
Step 3: Pour the full can of chili with beans over the cheese layer, spreading it all the way to the edges so every bite has plenty of that savory chili goodness. Then, sprinkle the remaining shredded Mexican cheese evenly over the top to create a delicious cheesy crust as it bakes.
Step 4: Bake your dip in the preheated oven for 20 to 25 minutes. You want to see the cheese on top melt completely and bubble slightly around the edges. This signals that your dip is perfectly heated through and ready to serve.
Step 5: Let the dip cool for a few minutes before serving with your favorite tortilla chips, crackers, or sliced bread. This little rest time helps it set, making it easier to scoop up generous portions.
Servings and Timing
This 3-Ingredient Chili Cheese Dip Recipe comfortably serves about 6 people as a snack or appetizer. The prep time is a quick 5 minutes since you’re mostly layering ingredients, and the baking time is about 20 to 25 minutes, bringing your total time to roughly 30 minutes. No additional resting or cooling time beyond a brief 5-minute cooldown after baking is needed to enjoy this dip at its best.
How to Serve This 3-Ingredient Chili Cheese Dip Recipe
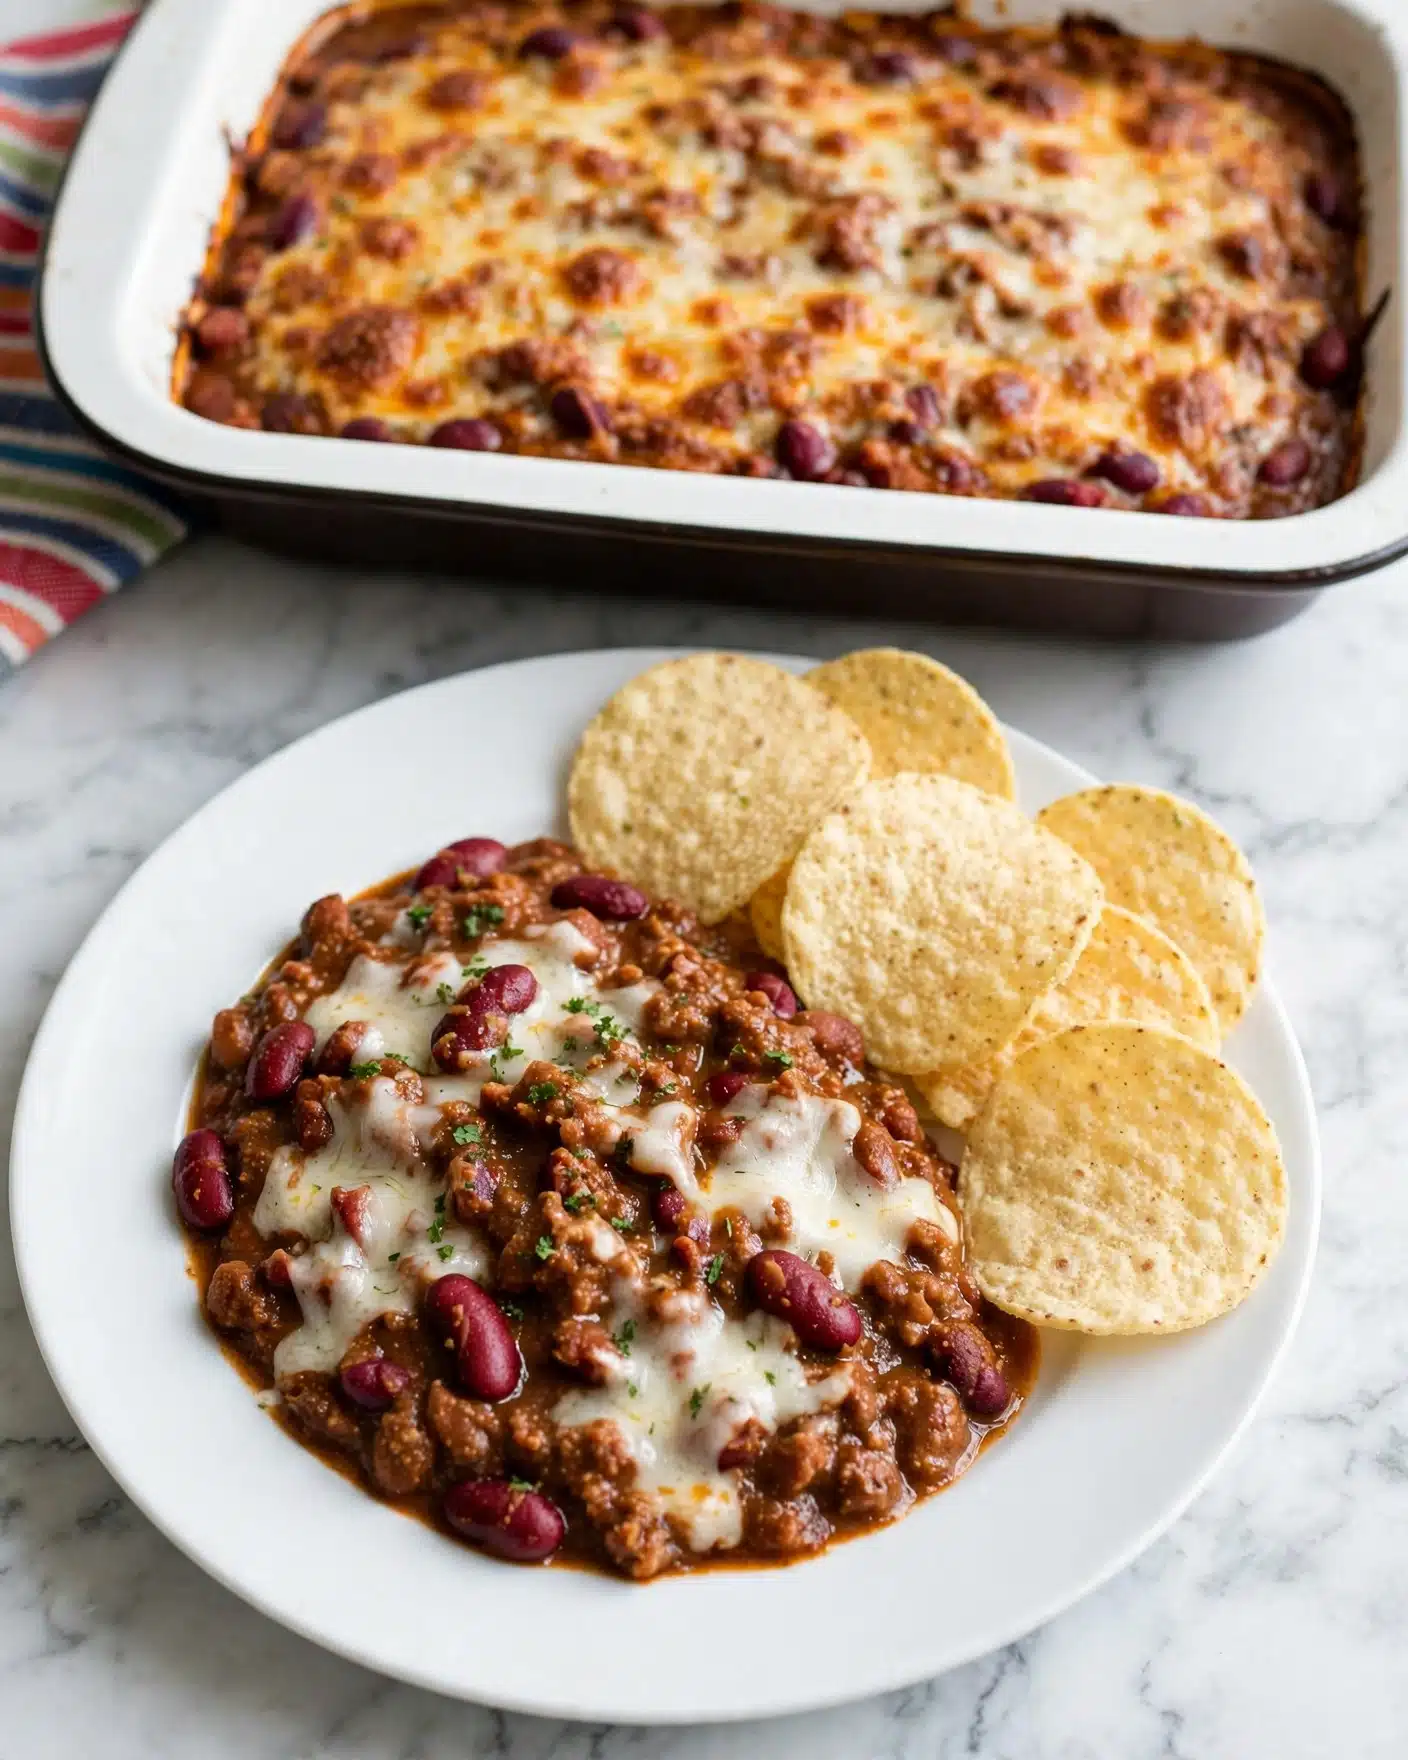
When I serve this dip, I love arranging it on a platter surrounded by an assortment of dippers. Tortilla chips are a classic pairing and add a nice crunch contrast, but I also enjoy offering slices of crusty bread and an array of crunchy crackers. The versatility means everyone can find their perfect vehicle for scooping up that cheesy chili goodness.
For a pop of freshness and color, I sometimes garnish the dip with chopped green onions or a few sliced jalapeños for those who want a little extra heat. A sprinkle of fresh cilantro can brighten it visually and flavor-wise too. Presentation-wise, serving the dip in its baking dish keeps things casual and cozy, perfect for family gatherings or friendly get-togethers where sharing is the name of the game.
In terms of temperature, I think this dip is best enjoyed warm—melty cheese just tastes better that way. But if you ever want to make it ahead, you can bake it and then gently reheat it before serving. Pair it with a cold glass of iced tea, lemonade, or any sparkling non-alcoholic beverage to keep the flavors fresh and balanced. This dip shines for casual parties, potlucks, or even a fun weeknight snack when you need comfort food that is quick and satisfying.
Variations
I love that this 3-Ingredient Chili Cheese Dip Recipe is such a great foundation for customizing. If you want to switch things up, try swapping the Mexican shredded cheese blend for a sharp cheddar or pepper jack to add a different flavor profile or a little more spice. For a fresher take, you can add diced tomatoes or green chilies on top before baking.
If you’re catering to dietary needs, this recipe is easy to adapt as well. Using a dairy-free cream cheese and vegan cheese shreds makes it perfect for vegan guests without compromising creaminess. You could even use a gluten-free chili to ensure it’s safe for those with gluten sensitivities, making this dip an inclusive crowd-pleaser.
For a different cooking method, I’ve sometimes prepared this dip in a slow cooker by layering the ingredients and turning it on low until everything melts together beautifully. It’s a wonderful option for keeping the dip warm and ready at parties without the need for oven space.
Storage and Reheating
Storing Leftovers
If you find yourself with leftovers, no worries—I recommend storing the chili cheese dip in an airtight container or keeping it covered in the original baking dish with plastic wrap. It will stay fresh in the refrigerator for up to 3 to 4 days. When storing, try to press plastic wrap directly onto the surface of the dip to prevent a skin from forming.
Freezing
This dip can be frozen, but because of the cream cheese and cheese, the texture might change slightly once thawed. To freeze, spoon the dip into a freezer-safe, airtight container or heavy-duty freezer bag and label it with the date. It should keep well for up to 2 months. When you’re ready to enjoy it again, thaw it overnight in the refrigerator for the best results.
Reheating
The best way to reheat your leftover dip is in the oven or a microwave. I find reheating in the oven at 325°F for about 15 minutes keeps the texture closer to freshly baked—just cover the dish loosely with foil so it doesn’t dry out. Microwave reheating is faster, about 1 to 2 minutes on medium power, but you’ll want to stir halfway through to ensure even warming. Avoid overheating to prevent the cheese from becoming rubbery and the dip from separating.
FAQs
Can I make this dip ahead of time?
Absolutely! You can assemble the dip a few hours before baking and keep it covered in the refrigerator. When you’re ready to serve, bake it as directed. This makes it really handy for parties or meal prep.
What if I don’t have Mexican shredded cheese?
No problem! You can use a blend of cheddar, Monterey Jack, or even mozzarella cheese. Each will melt nicely and bring their own unique flavor to the dip.
Is there a way to make this recipe spicier?
Definitely. You can add diced jalapeños or a pinch of cayenne pepper to the chili before layering. Another option is to choose a spicy chili or add hot sauce on the side for guests who like a little extra heat.
Can I use homemade chili instead of canned?
Yes, homemade chili works wonderfully in this recipe and can elevate the flavor even more. Just make sure your chili isn’t too liquidy so the dip stays thick and scoopable.
What are some good dippers for this chili cheese dip?
I like pairing the dip with crunchy tortilla chips, hearty crackers, sliced baguette, or even fresh veggie sticks like bell peppers and celery for a lighter option. The variety keeps everyone happy and adds great texture contrast.
Conclusion
I truly hope you enjoy making and sharing this 3-Ingredient Chili Cheese Dip Recipe as much as I do. It’s one of those magical dishes that is simple, comforting, and absolutely crowd-pleasing every time. Whether you’re feeding family, entertaining friends, or just craving some warm, cheesy goodness, this dip will not disappoint. Give it a try soon—you’ll thank me later!
Print3-Ingredient Chili Cheese Dip Recipe

This easy 3-Ingredient Chili Cheese Dip is a crowd-pleasing appetizer perfect for parties and casual get-togethers. Made with creamy room-temperature cream cheese, hearty Hormel chili with beans, and a flavorful blend of Mexican cheese, it bakes to bubbly perfection in under 30 minutes. Serve warm with tortilla chips, crackers, or sliced bread for a comforting, cheesy dip that everyone will love.
- Prep Time: 10 minutes
- Cook Time: 20-25 minutes
- Total Time: 30-35 minutes
- Yield: 6 servings
- Category: Appetizer
- Method: Baking
- Cuisine: American
Ingredients
Dip Ingredients
- 8 ounces cream cheese, room temperature
- 1 cup shredded Mexican cheese blend, divided
- 25 ounces Hormel chili with beans
Instructions
- Preheat Oven: Preheat your oven to 350°F (175°C) and lightly grease a 1 ½ quart baking dish with cooking spray to prevent sticking.
- Layer Cream Cheese: Spread the softened cream cheese evenly across the bottom of the prepared baking dish, creating a smooth base layer.
- Add Cheese Layer: Sprinkle ½ cup of the shredded Mexican cheese evenly over the cream cheese layer to add cheesy richness.
- Add Chili Layer: Pour the entire can of Hormel chili with beans over the cheese layer, spreading it evenly to cover the surface.
- Top with Remaining Cheese: Sprinkle the remaining ½ cup of Mexican cheese on top of the chili layer for a melted cheesy finish.
- Bake: Place the baking dish in the oven and bake for 20 to 25 minutes until the cheese is melted and bubbly around the edges.
- Serve: Carefully remove the dish from the oven and serve warm with tortilla chips, crackers, or sliced bread for dipping.
Notes
- For a spicier dip, use a chili with added jalapeños or hot sauce.
- Make sure the cream cheese is softened to room temperature for easy spreading.
- This dip can be prepared ahead of time and refrigerated before baking; just add a few extra minutes to the baking time if chilled.
- Leftovers can be stored in the refrigerator for up to 3 days and reheated in the oven or microwave.




Leave a Reply